Creating Lesson
Creating Independent Lessons in the LMS
To create an independent Lesson:
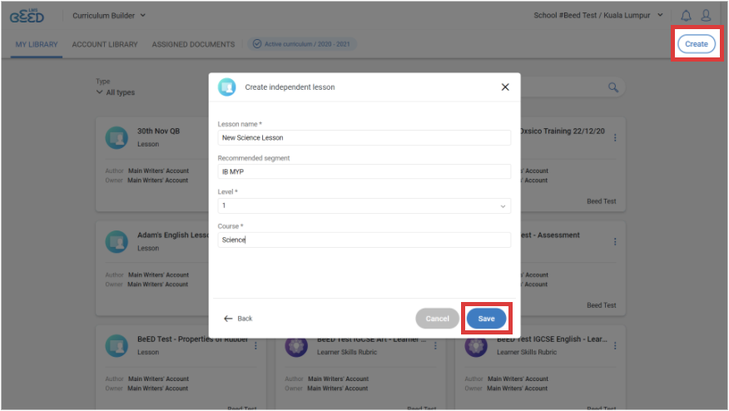
1. In My Library, click Create in the top right corner.
2. Select Lesson from the listed document types. Fill in the required fields and click Save.
Make sure you select your Course from the drop down menu. If your Course doesn’t appear, please contact your Administrator to add it in the Admin Panel
Under the Basic Info tab:
3. Insert the Lesson description and Assessment Type.
4. (Optional) Import or create the Syllabus, Objectives, Assessment Rubric, Learner Traits and Learner Skills for this Lesson by clicking on the plus or import icon for each document.
Under the Concepts tab:
5. (Optional) Toggle on the relevant pedagogical methodologies and insert information in the respective fields. For concepts, press the Enter key every time you input in a new concept.

Under the Content Creation tab:
6. Fill out the fields available on the upper half of the page.
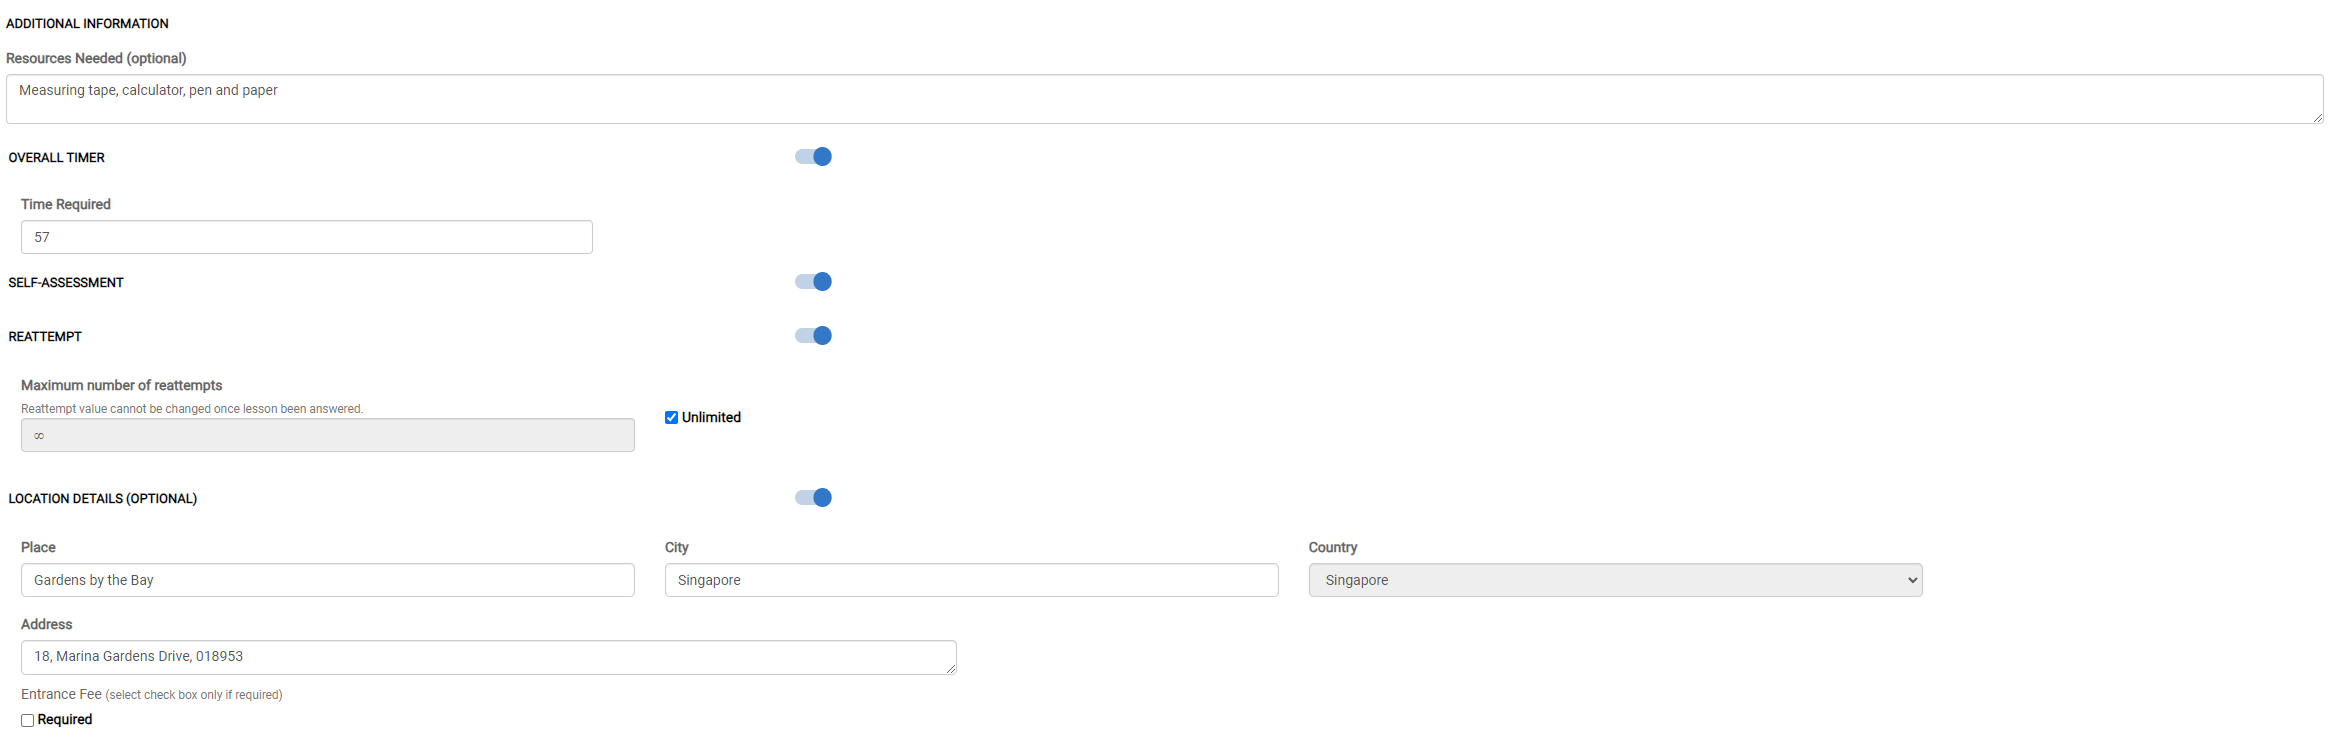
The settings available include:
Overall Timer: Set the total time (in minutes) for learners to complete the lesson.
Self-Assessment Toggle: Enables learners to self-assess their work by comparing it with the sample answers provided by the educator.
Reattempt: Allows learners to reset and retry the lesson. Only the final attempt will be recorded in the gradebook.
Location Details: Enables educators to provide specific location information for lessons involving geographical locations or expeditions. Additional details such as entrance fees can also be included.
7. Insert a learning roadmap by clicking on the pencil icon in the top right of the Main map section and inserting an image. The image can be a map for outdoor learning, or a mind map listing out the topics covered in this lesson. Click here to download some map templates, or look for ideas on how to use maps creatively.
9. Click on the + icon below the map. This creates new stages for this Point. Enter your Stage Name and fill in the required fields. Then, click Create Stage in the bottom left. You can click on the pencil or trash icon respectively to edit or delete the stage.
10. Click on + Lesson Block or + Question Block to structure your Lesson. You can drag these blocks forward or back to rearrange their order. To delete a block, click on the trash bin icon in the top right of the block. Watch the videos below for more details on how to create Lesson blocks, Open Response blocks and MCQ blocks.
11. Click Save in the top right once you’re done.
Creating Nested Lessons in the LMS
To create a nested Lesson:
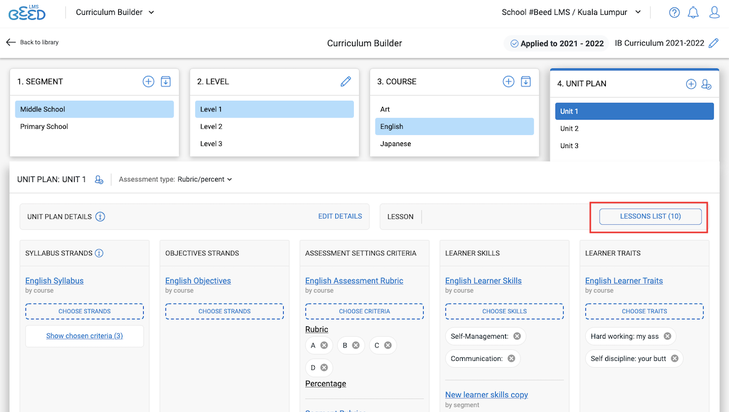
1. Go to the Curriculum Builder page. In the lower right side of the page, navigate to the Unit Plan you want to nest your lesson inside. Click on the Lessons List button.
2. In the subsequent page, click on the + New button.
Under the Basic Info tab:
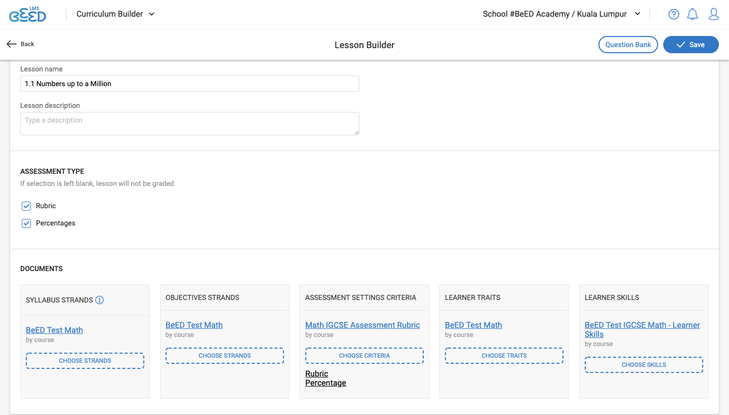
3. Insert the Lesson name, description and assessment type. Select the strands/criteria from the Syllabus, Objectives, Assessment Rubric, Learner Traits and Learner Skills that apply to this Lesson.
Under the Content Creation tab:
4. Fill up the necessary fields in the upper half of the page.
5. Insert a learning roadmap by clicking on the pencil icon in the top right of the Main map section and inserting an image. The image can be a map for outdoor learning, or a mind map listing out the topics covered in this lesson. Click here to download some map templates, or look for ideas on how to use maps creatively.
7. Click on the + icon below the map. This creates new stages for this Point. Enter your Stage Name and fill in the required fields. Then, click Create Stage in the bottom left. You can click on the pencil or trash icon respectively to edit or delete the stage.
8. Click on + Lesson Block or + Question Block to structure your Lesson. You can drag these blocks forward or back to rearrange their order. To delete a block, click on the trash bin icon in the top right of the block. Watch the videos below for more details on how to create Lesson blocks, Open Response blocks and MCQ blocks.

Educators can preview lessons from a learner's perspective, enabling them to fine-tune the content and improve the learning experience.
What's the difference between Independent and Nested Lessons?
A nested Lesson differs from an independent Lesson in the following aspects:
No Comments