Add Learner
Pre-Requisites
- Academic Year and Term must be created before adding learners
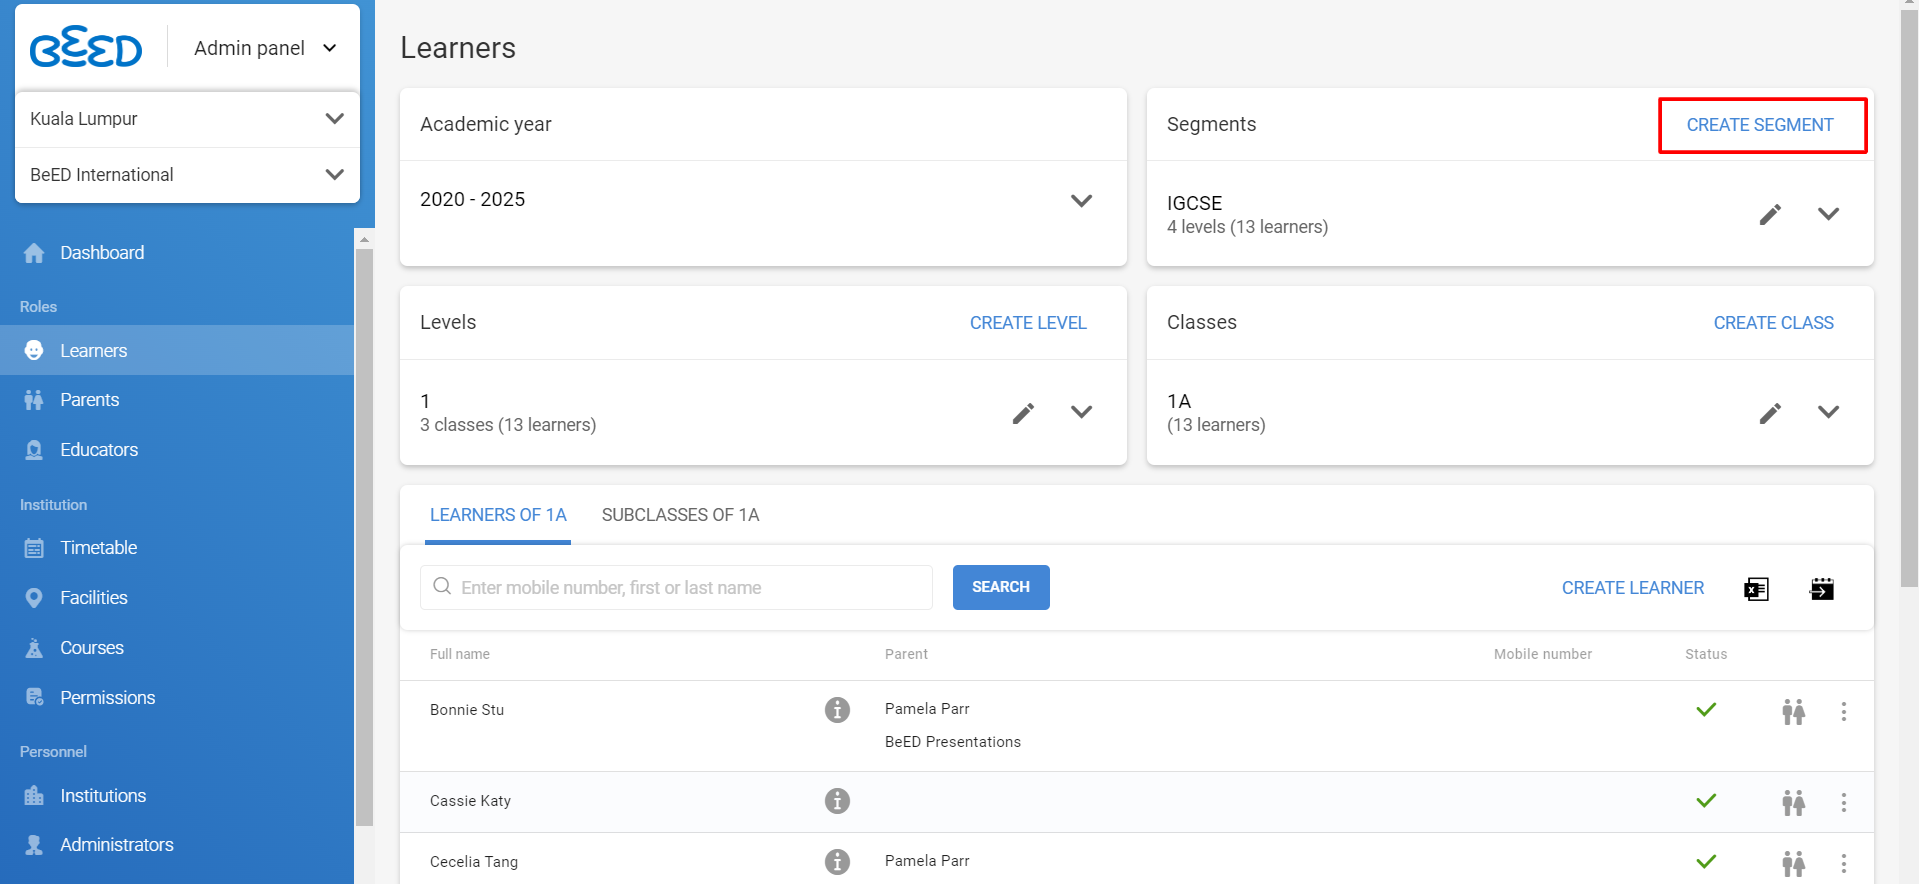
Segments
| Action | Steps |
|
|
1. On Learner Tab, select "Create Segment" 2. Enter Segment Name |
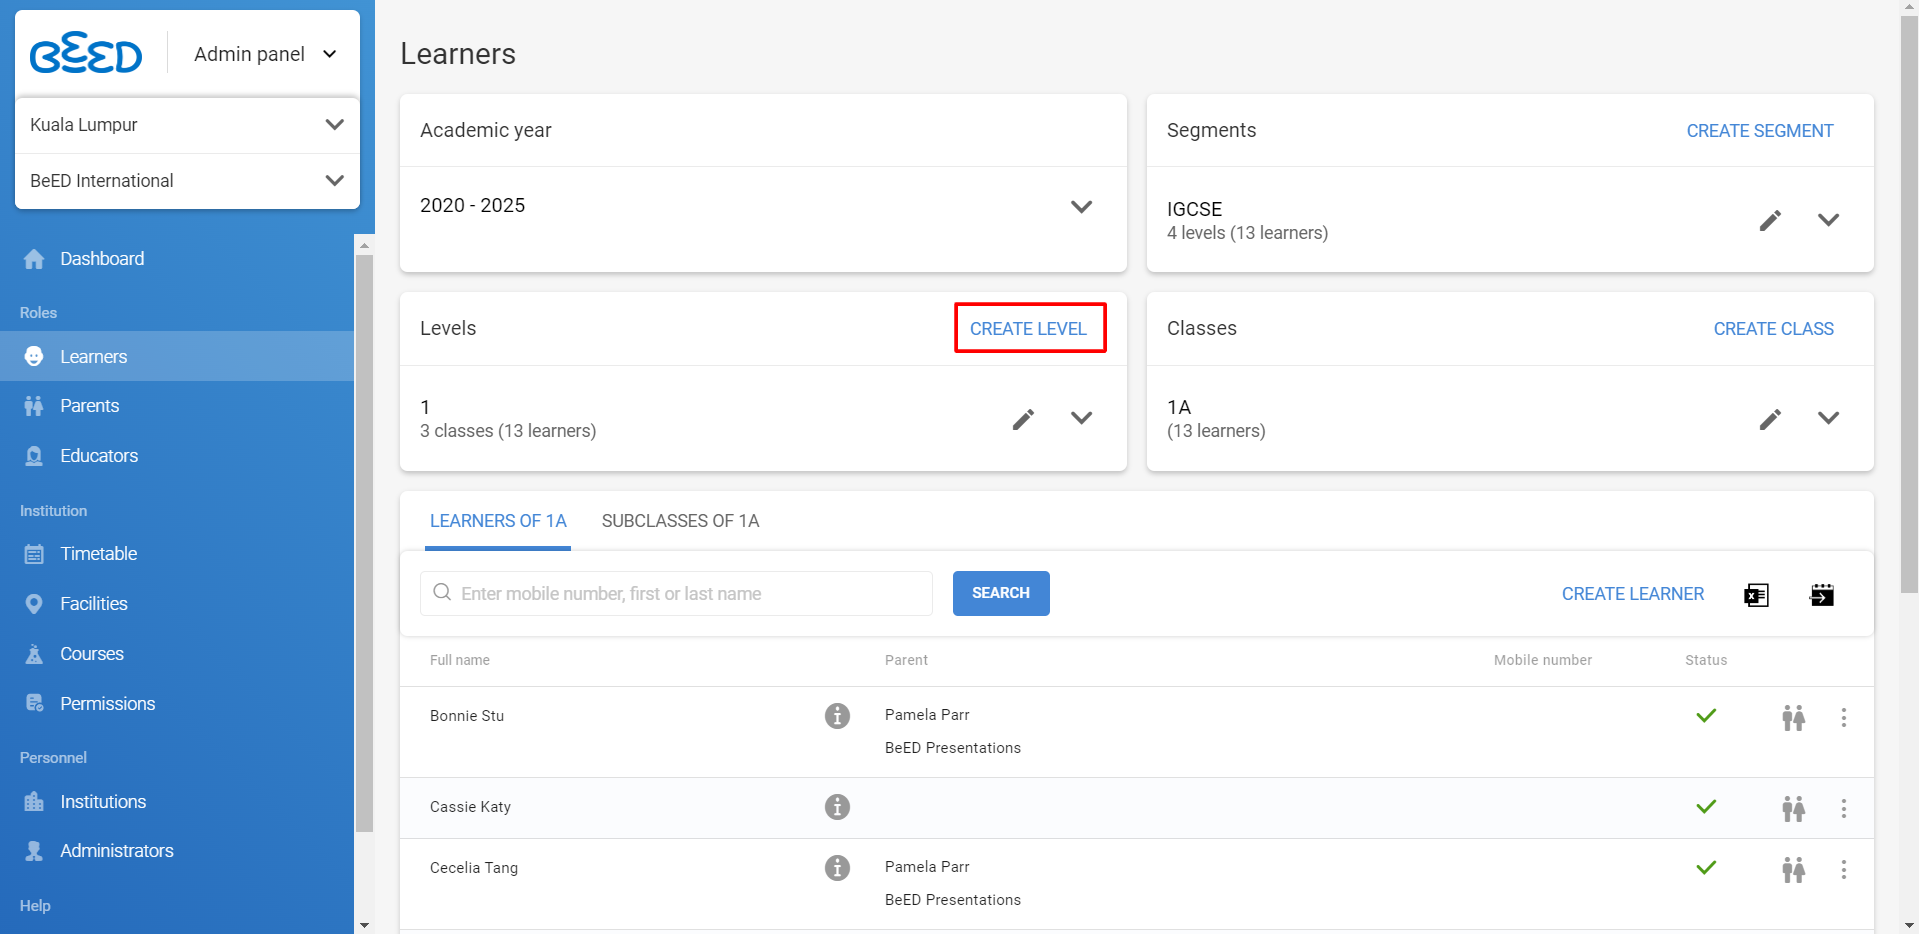
Level
| Action | Steps |
|
|
1. On Learner Tab, select "Create Level" 2. Select the level to create |
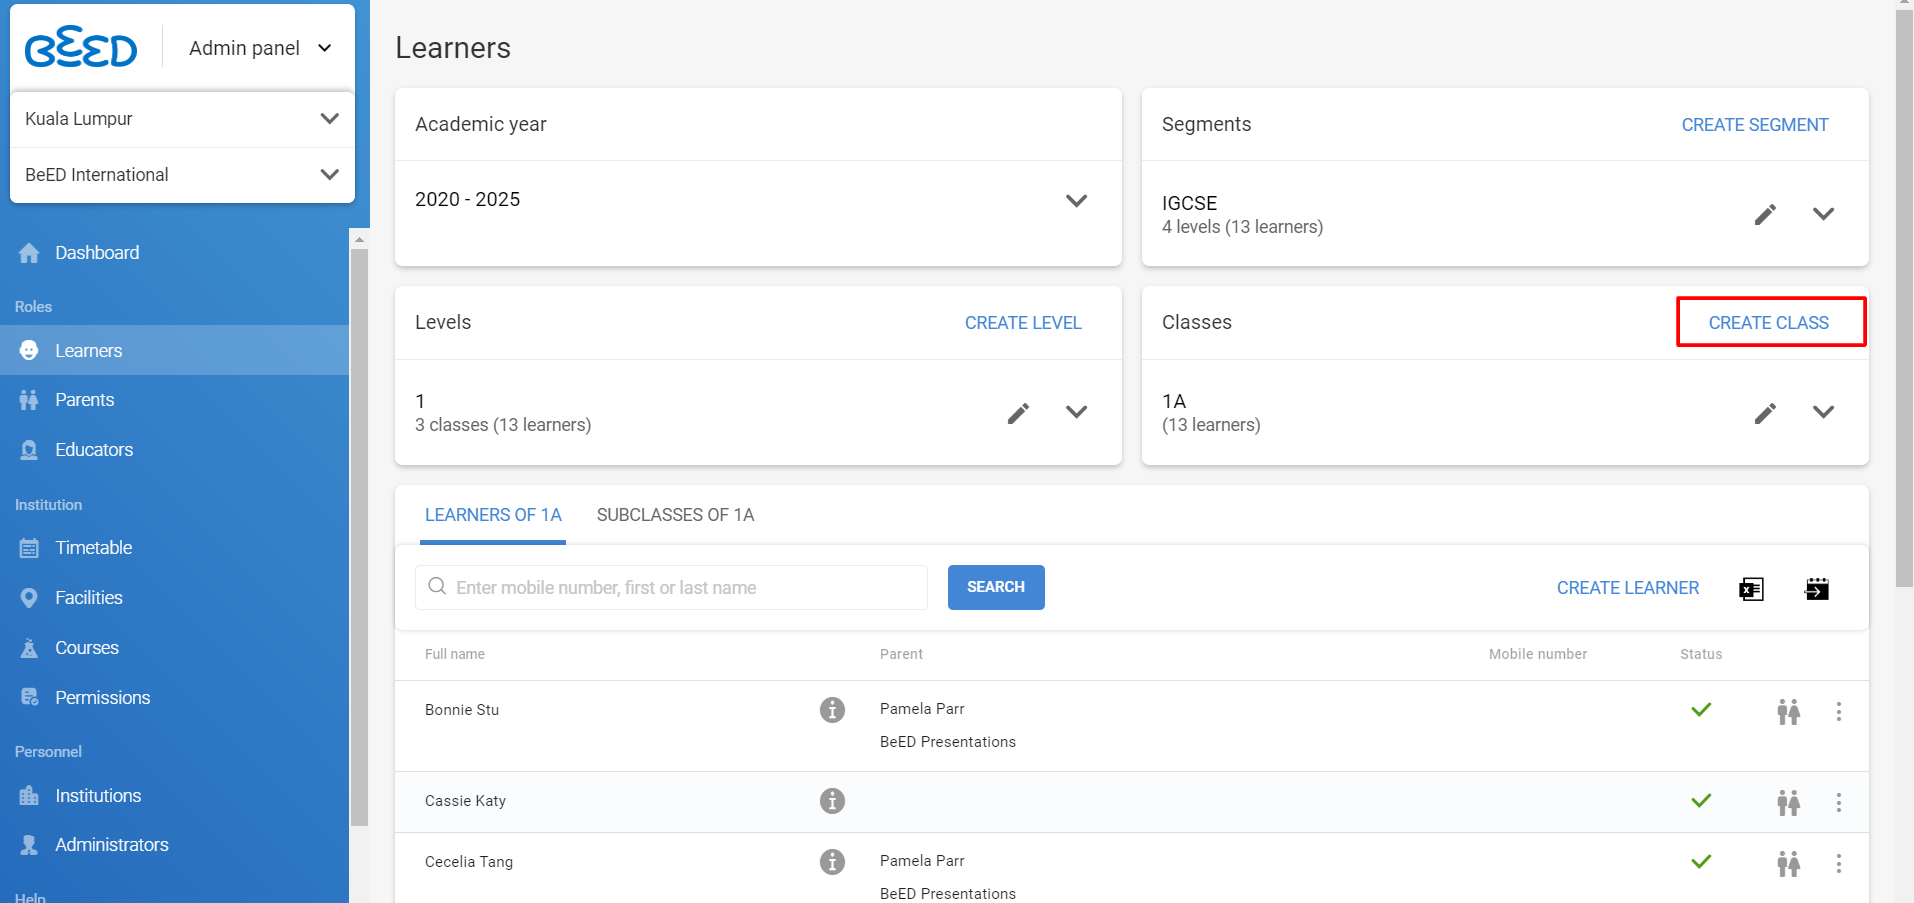
Classes
| Action | Steps |
|
|
1. On Learner Tab, select "Create Class 2. Enter the Class Name and choose Homeroom Educator Notes:
|
| Action | Steps |
|
|
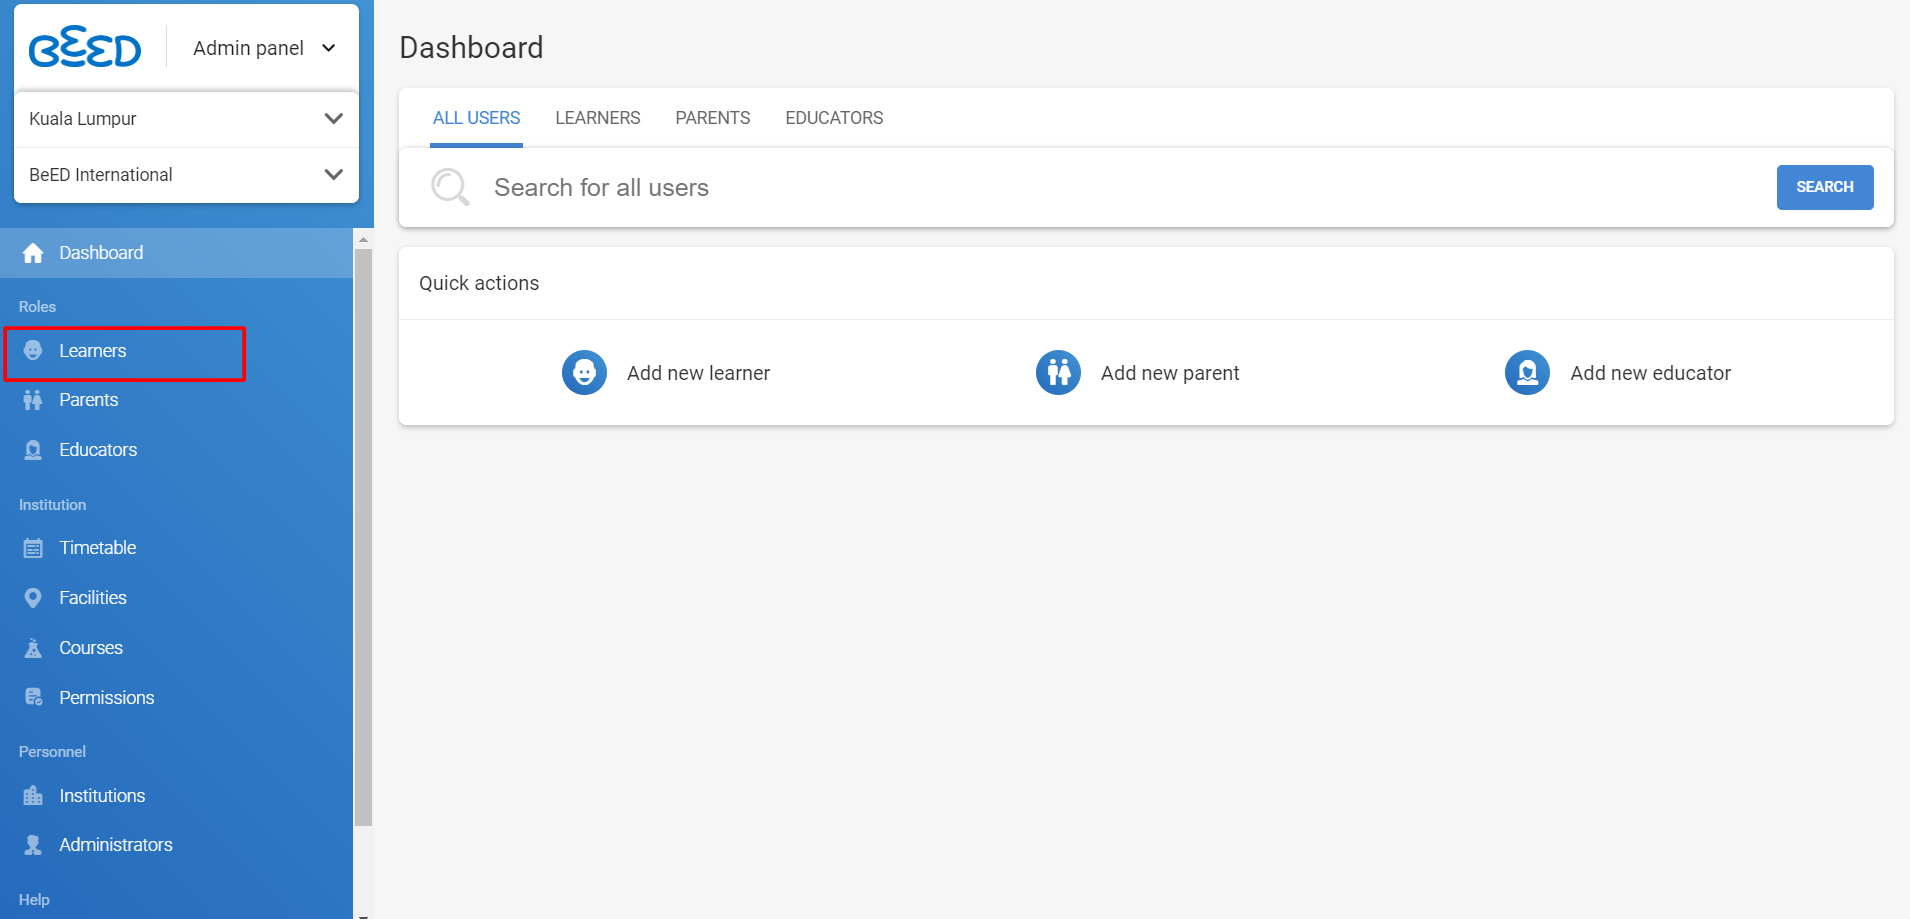
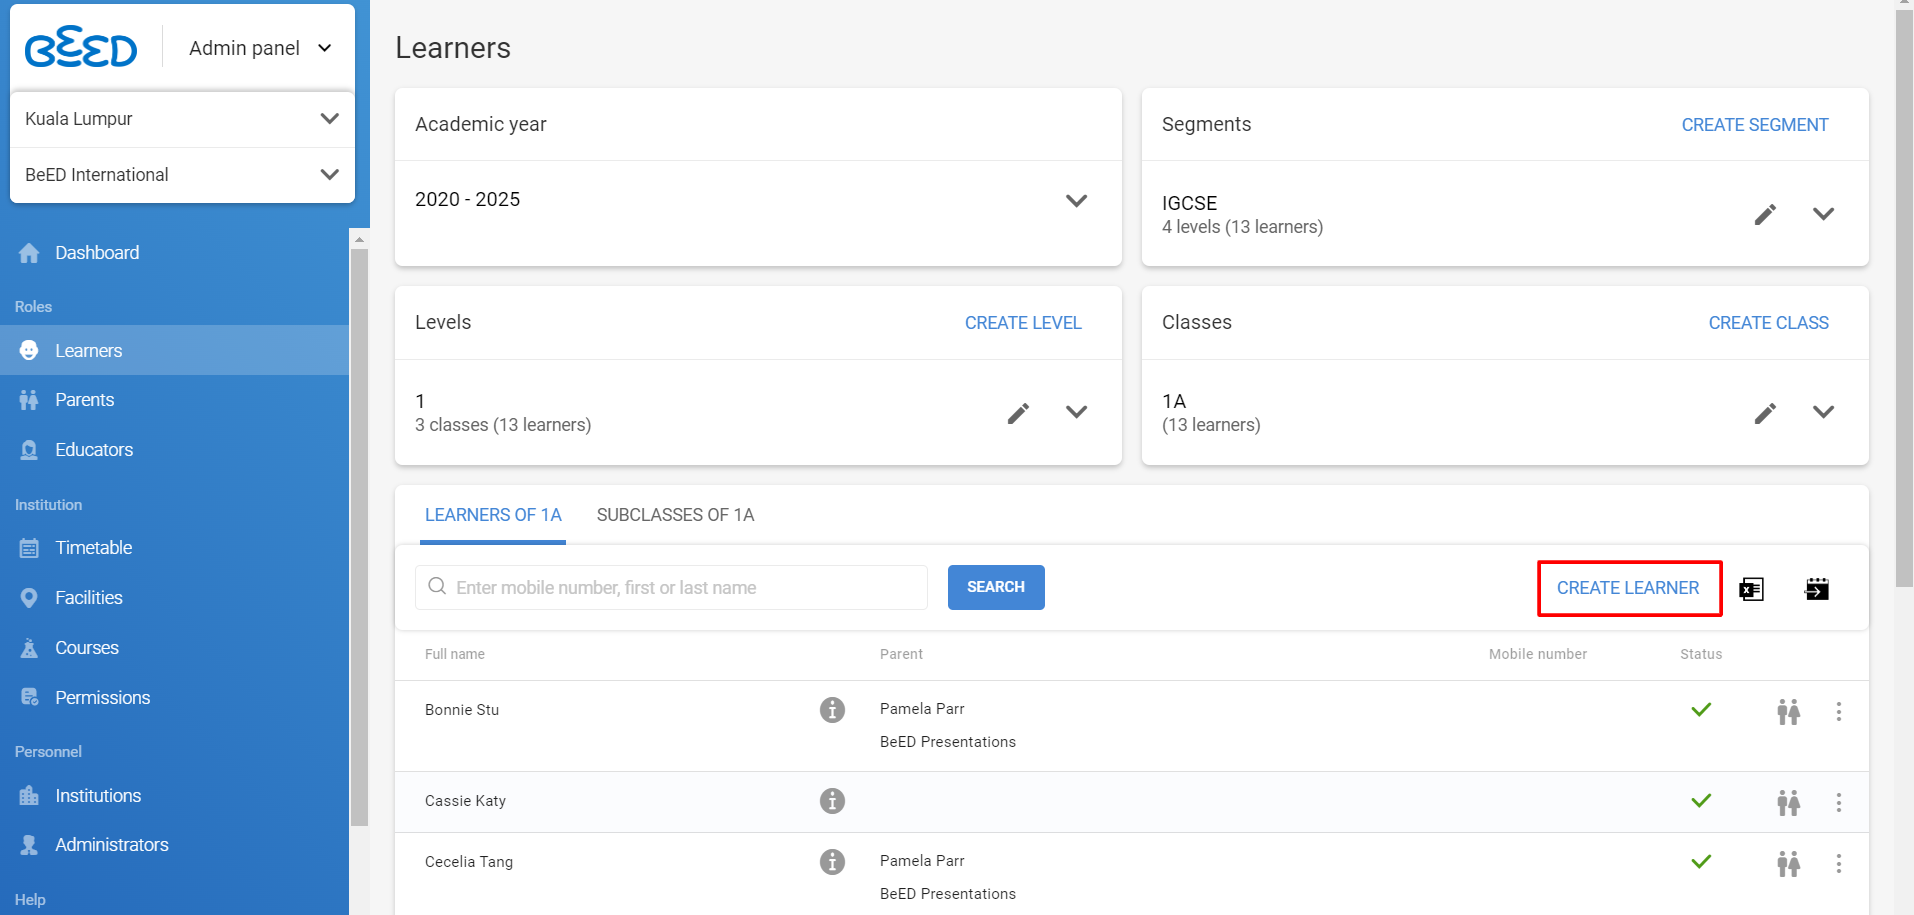
1. On Admin Panel, Select Learners |
|
|
2. Select Create Learner. Enter required fields: First Name Email Address Date of Birth Gender. |
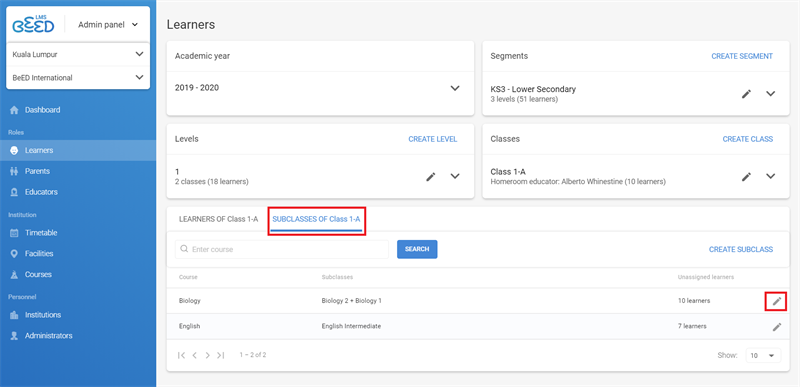
Creating a Subclass
| Action | Steps |
|
|
1. To create a Subclass, select the Segment, Level, and Class for which you would like to create a Subclass. Click on the Subclasses of the (Class) tab. 2. Click on the Create Subclass button. 3. On the Create subclass page, fill in the relevant information in their respective fields. Click on Create Subclass once you are satisfied with the changes. 4. This will bring you back to the Subclasses page. Click on the pencil icon to assign specific Learners to their respective subclasses. 5. The left column will be a list of unassigned Learners and the right column will list the subclasses available. Drag and drop unassigned Learners from the left column into their respective subclasses. 6. Click on Save once you are satisfied with your changes. |
Bulk Learner Upload
| Action | Steps |
|
|
1. Download the Template The template can be downloaded from the "Bulk Download" tab on your learner section on the Admin Panel: Download Template. Download the file: Save the template file to your computer. |
|
|
2. Fill in the Template Open the file: Use any spreadsheet software (Excel, Google Sheets, etc.). Enter Learner Information: Fill in the necessary details for each learner. The columns include:
|
|
|
3. Save the Filled Template Save your changes: Save the file after entering all the required information.
|
|
|
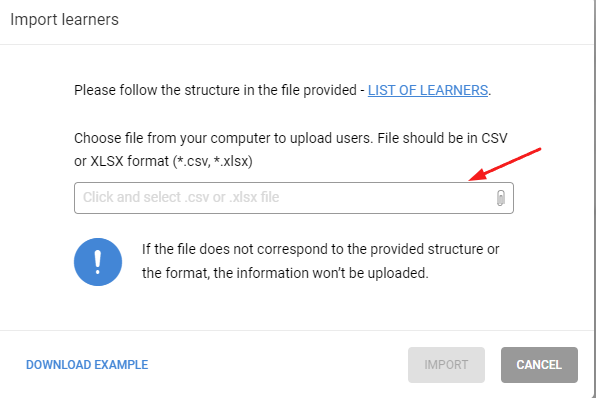
4. Upload the Filled Template to the LMS Log in to the LMS Admin Panel: Use your admin credentials to log in. Go on the learner section, Click on Import Learner by Excel File Icon Upload the File:
|

Note: The bulk import steps for learners follow the same process as for parents and educators
Refer to this page for Transfer Learners Across Classes
No Comments