Journeys - Getting Started With Journeys
How to sign up for BeED Journeys
By signing up, you will be able to access the following features in BeED Journeys:
-
purchase unique Learning Experiences available in the BeED Nexus (Marketplace).
-
create customized Learning Experiences tailored to fit your learners’ needs and proficiency levels for indoor or outdoor lessons.
-
create and manage Hubs where you can add and organize an unlimited number of members so that they have access to your purchased or created Learning Experiences and itineraries.
-
view learner answers and provide personalized feedback through the Learner Feedback page in the Hub
-
create your own customized tours or plans by using the Itinerary Planner.
-
post and participate in forums managed by you or others in your shared network of users.
-
use your personal Journal to add and keep track of daily activities and reflections.
-
access the BeED Journeys app, where you can conduct or partake in indoor/outdoor lessons even when there is no Internet connectivity.
-
book customized group trips through our Travel Concierge Services
Here’s how to get started:
Step 1: On the BeED homepage, click Sign Up for Free.
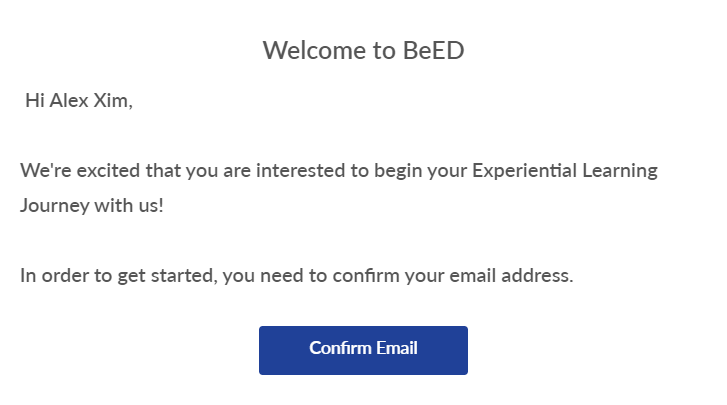
Step 2: Sign up using the email address of your choice. You will be sent a confirmation email to your designated email address.
Step 3: Click on the link in the confirmation email to complete your personal details. Congratulations! You are now BeED’s newest member!
Step 4: Proceed to log in on the BeED homepage.
Logins and Passwords
Welcome to the BeED Community!
To get started on your learning or teaching journey, make sure you’ve first activated your account with us by clicking on the activation link in the confirmation email sent to you*.
You will then be asked to set your password after clicking the activation link.
In order to use the Google or Facebook Single Sign-On (SSO), the email that has been registered to your BeED account must be the same email linked to your Google or Facebook accounts.
*If you haven’t received the confirmation email, please check your spam folder or contact your Institution Administrator.
I received an ‘invalid token’ error. What should I do?
Invalid tokens happen due to one of several reasons:
1. Your account activation link may have expired.
- To get a fresh link, click on the Forgot Password link which can be found at the login page. Key in your email address and click submit. You will receive an email with a new link for you to set your password and activate your account.
2. Your password may have been double-saved by your browser during account activation
- Go to the BeED login page and login using the email address and password you’ve previously set. You should be able to successfully log in.
If you’re still having trouble, contact us through the Help Desk icon in the bottom right, or email us at contact@beed.world.
How do I change my password?
Go to the BeED login page and click on the Forgot Password link. Key in your email address and click submit. You will receive an email with a new link for you to reset your password.
How do I set up Google or Facebook Single Sign-On (SSO)
1. Log in to Facebook or Google using the same email address as your BeED login.
2. Go to the BeED login page and click on the Facebook or Google icons. You’ll be automatically logged in.
A Quick Walkthrough of BeED Journeys
Thank you for choosing BeED Journeys - we’re ecstatic to have you onboard with us!
With Journeys, you’re now able to do the following:
- Create interactive Learning Experiences for indoor or outdoor learning
- Create and manage Learner groups for classes or workshops
- Conduct/participate in digital Learning Experiences through the BeED website or mobile app
- Gain access to announcements, discussion forums and private messaging through BeED Connect
- Plan detailed itineraries for indoor or outdoor activities
- Save your daily thoughts and reflections through the Journal
- Browse and purchase Learning Experiences for your Learners
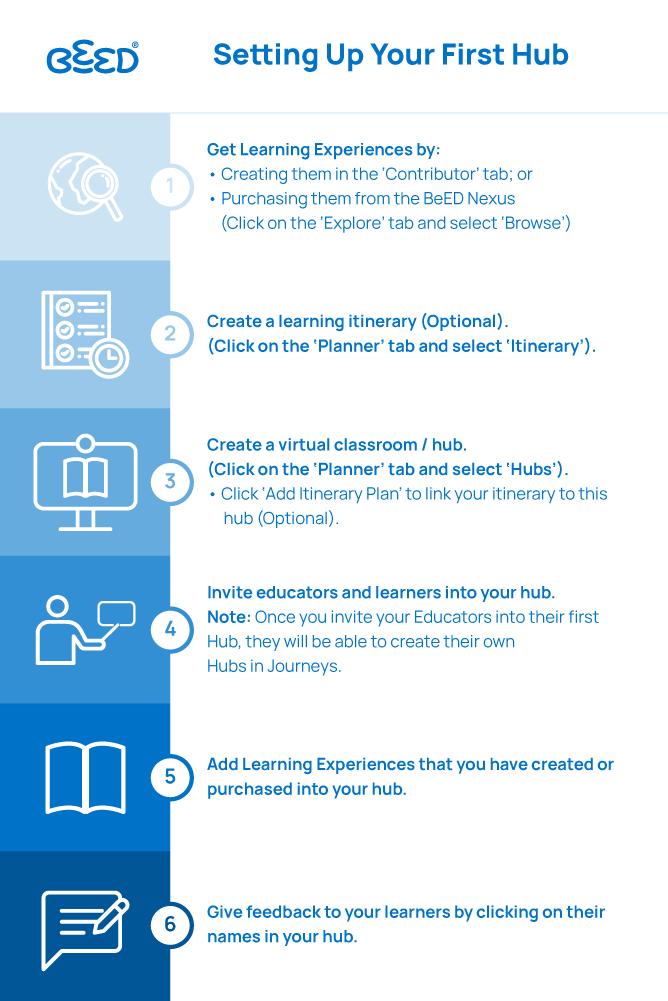
For a quick overview of how to get started on BeED Journeys, please refer to the flowcharts below for a step-by-step guide.
For more detailed instructions on how to perform a particular task, please refer to any of the categories in this section and select the article that is relevant to you.
If you still cannot find an answer to your question, please contact us through the Help Desk and we’ll be more than happy to assist you.
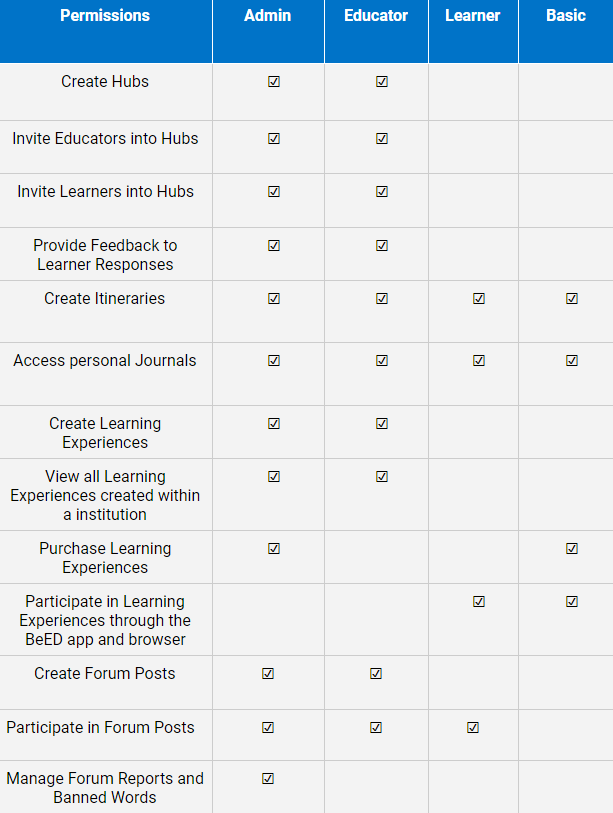
What can Different Roles do?
BeED Journeys allows you to have more than one role within an account (linked to an email address). These roles are Admin, Educator, Learner and Basic. These roles hold the following permissions:
Switching Roles through the Browser
If you are logged in as a Basic Member, you will need to change your account role before you can access Educator features.
To switch your role, click on your profile icon in the main dashboard and then on Switch Role.
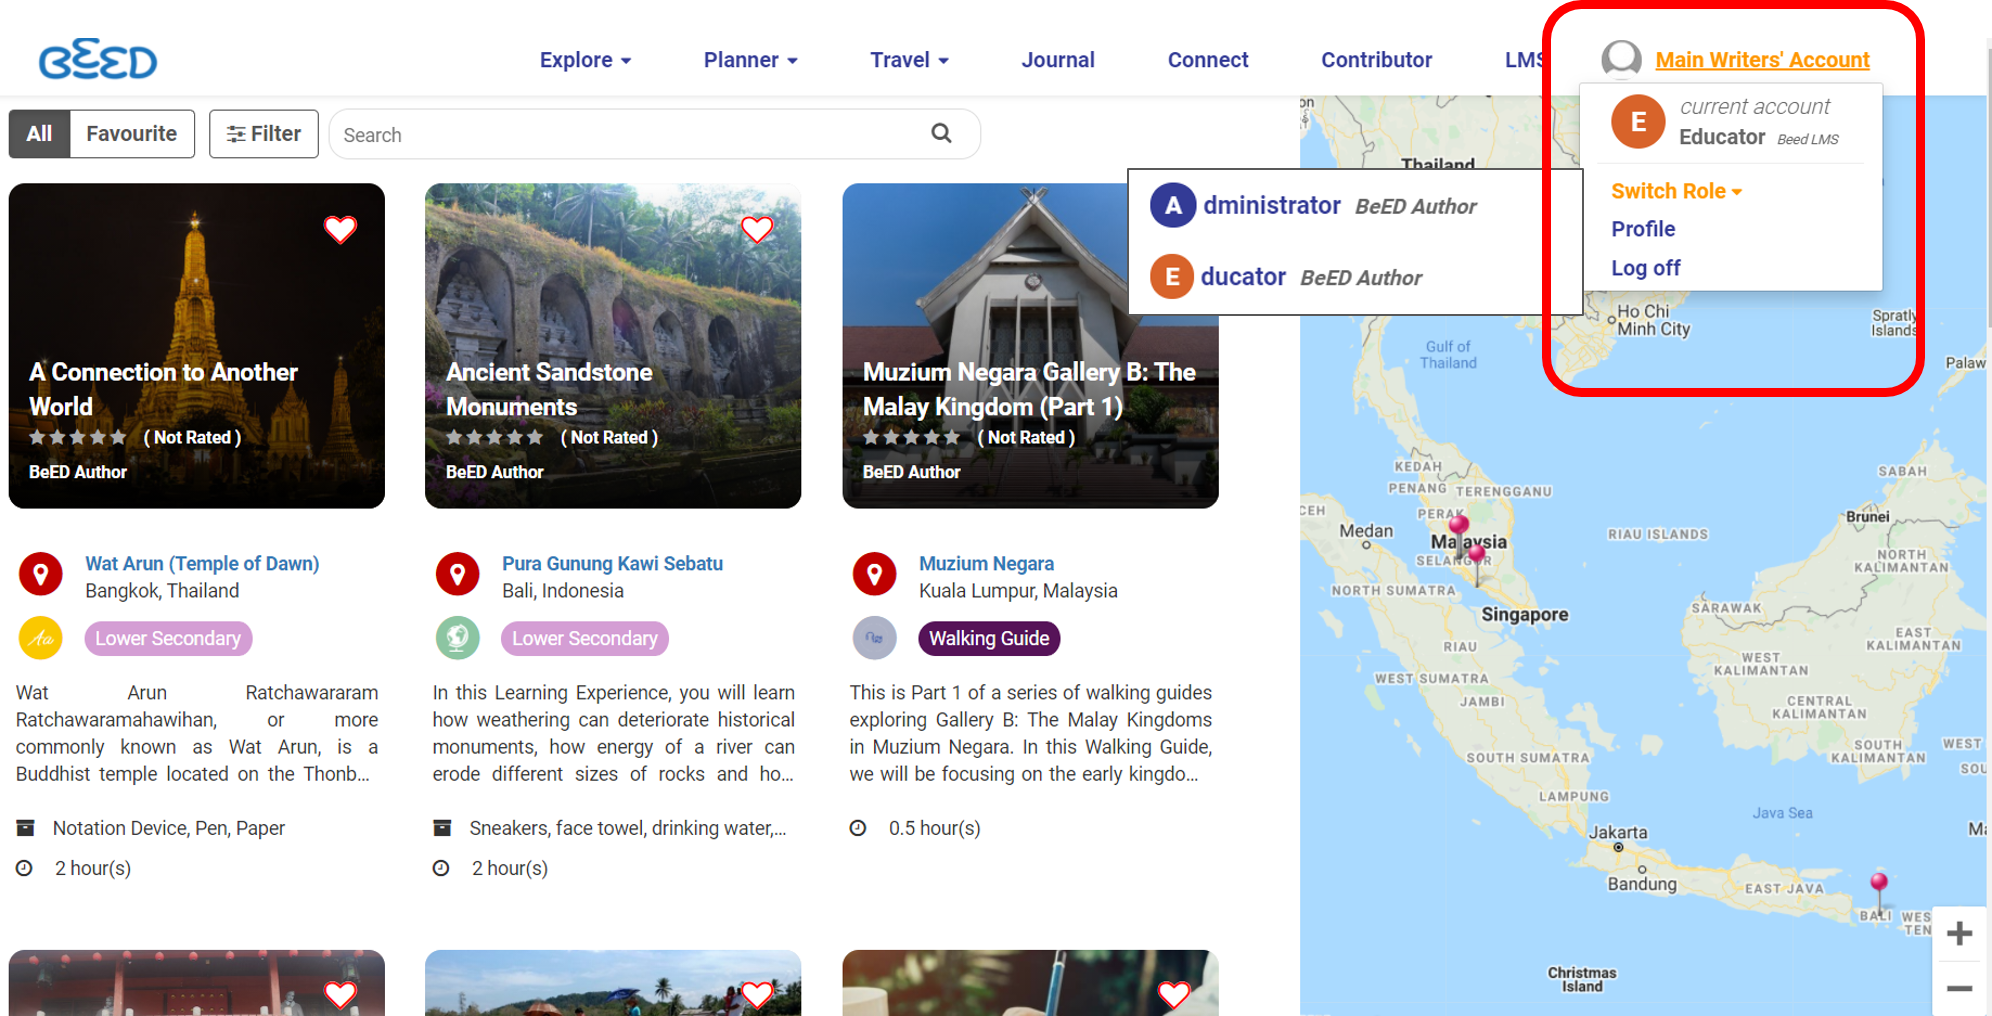
Select Educator from the drop down menu.
With the Educator role, you will now see several other features previously not seen on your Basic Member role.
Switching Roles in-App
When you first log into the BeED app, your app will not display any other LEs except for the Tutorial LEs. This is because the account you’re logged into is a Basic Member account.
To make other LEs accessible, you will need to switch your role to an Educator or Admin role. Note: You will only have an Educator role if you have been invited into a Hub as an Educator by your Institution Admin.
Tap on the Account Settings function in the menu of the BeED app to access the Switch Role feature:
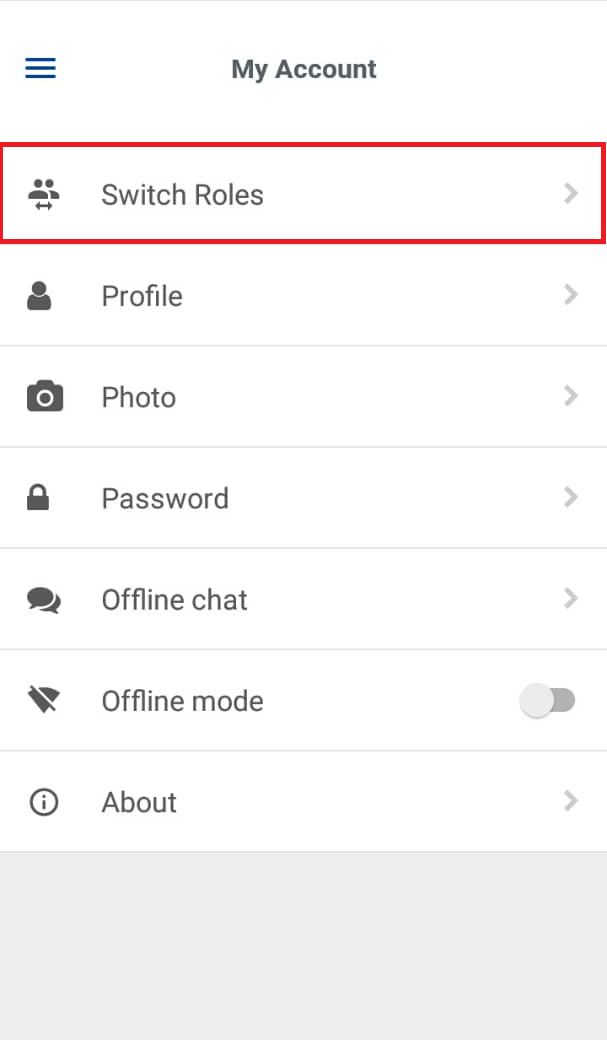
Select your role from the drop down list, and you’re done!
No Comments